“Twas the night before Christmas and all through the house…
Christmas Poem
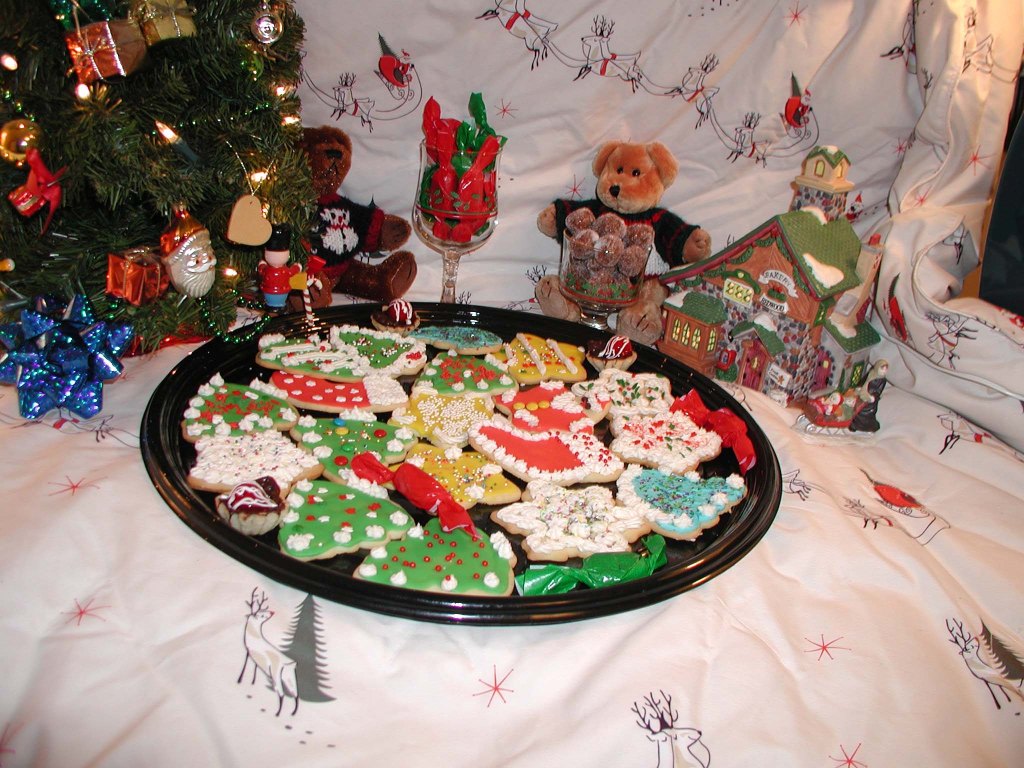
Once the garden is put to bed and snow covers the ground, it’s time to think of Christmas cookies. I have been an avid baker of cookies and candies for over 40 years so in the next month I will try to show you the full scope of putting together an old fashioned Christmas tray. I usually shoot for 30 types of candies and cookies. I try to put something new and different on the trays each year. I will post recipes as I can and tips as well so stay tuned.


When the lights go on in the little ceramic bakery, the baking season is on. I’ve had it on the counter for years and I love it.

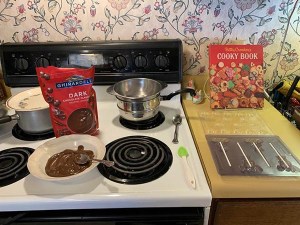

Heads up on the wafers. This year I could not use the Ghiradelli products for molded suckers and candy as it had a “bloom” when processed (it discolored when molded and very badly). I use Merckens or Clausen wafers with excellent results.
Top Center – Time to melt the wafers. I use either a double boiler or melt them in the microwave. The KEY concern here is to not get the wafers too hot. They will coagulate and discolor if that happens. So keep the burner on low in the double boiler and stir frequently until just melted. In the microwave, use the normal setting and go on thirty second intervals. Do not melt more that you can use for the molds that you have available.
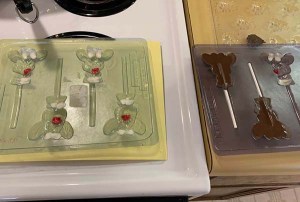
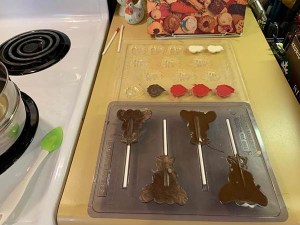
Top Right – I melt small dishes of colors used for detail, in this case 7 or 8 white wafers for the bells and horns of the reindeer and a 5 or 6 red wafers for the nose. I dab these areas of the mold using an extra sucker stick with the red and white wafers. You can use a brush depending how detail oriented you are. I have not had a lot of luck with brushes. You can keep the small cups of detail colors warm by placing in a pan on the stove with the burner on very low and a small towel in the pan so the dishes don’t get too hot. When I complete a batch, I have another mold ready to use up the leftover red and white wafers. These small molded candies make a nice filler on your trays. Cool your molds with detail colors for a couple of minutes in the refrigerator until set.
Lower Left – Time to fill with the chocolate wafer coating. I use a tablespoon and fill each cavity. Take care not to overfill and tap gently on the counter to get out all of the air bubbles. You can twirl your sucker sticks to make sure they are covered with the coating. Fill each cavity just to the top of the molds. Then refrigerate on an even surface for at least twenty minutes. When they are chilled all the way through, you can pop them out of the molds and apply luster dust with a small brush, place in poly bag and tie with a twist tie or red ribbon.
Lower Right – This photo shows the “bloom” problem I was having with the Ghiradelli wafer product. I did not have this problem with the white Ghiradelli wafer. Online research indicates this is usually a problem that can be attributed to improper storage at the big box store, usually to much heat or humidity in the warehouse.

Suckers with Luster Dust in Gold and Silver 
Tray of finished suckers
Product Review
One of the item I could not do with out are super parchment sheets. I have used them for years on all my cookie sheets and here’s why _ they keep baked items from sticking to the cookie sheet, no butter or other lubricant needed. Your cookie sheets and pans will look as good as new for years.
